Pick up a favourite jersey tee, a pair of leggings or a well-worn sweatshirt and turn the hem towards the light. On the outside you will see two or three neat, perfectly parallel lines of straight stitching. Flip it to the inside and there is something altogether different: a flexible ladder or grid of interlocking thread covering the raw edge. That is coverstitch, and it is the finishing stitch the ready-to-wear industry has relied on for decades to make knitwear look and feel properly made.
A coverstitch machine is the specialist tool that creates this finish, and while it has always been standard in factories, it is now genuinely practical for independent designers, small studio owners and serious home sewists. This article stays tightly focused on that stitch: what it looks like from both sides, why it performs so well on stretch fabrics, how it supports design and branding in small labels, and what a dedicated machine actually does that other equipment cannot. By the end, you will be able to spot coverstitch on the clothes already in your wardrobe, understand exactly why it reads as professional, and make a clear-eyed decision about whether adding one to your studio could lift the quality and marketability of your knit and jersey ranges. Juki UK is on hand as a knowledgeable partner throughout that process.
Why Coverstitch Finishing Is the Secret Behind That Professional, Ready-to-Wear Look
Seeing the Stitch: What Coverstitch Actually Looks Like on Real Garments
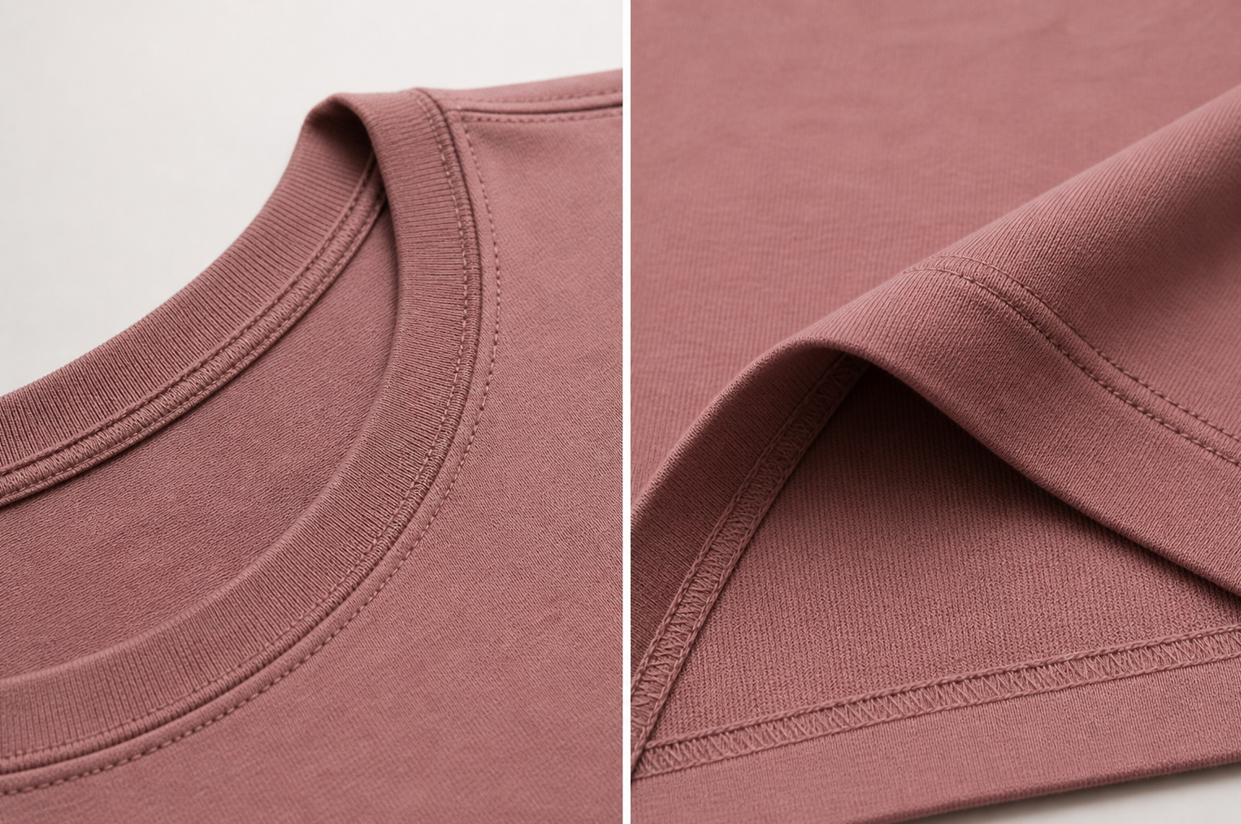
The clearest way to understand coverstitch is to look at clothes you already own. On the right side of a jersey hem, you see two or three straight, evenly spaced rows of stitching sitting perfectly flat against the fabric. Turn it over and the picture changes completely: a looper thread weaves back and forth between those needle lines in a ladder or grid pattern, covering the folded hem allowance entirely. The name is literal. The stitch covers the edge.
It is formed by multiple needles working from the top while a single looper thread on the underside chains between them, creating a seam that is bonded from both directions, which is what gives it its characteristic stretch. You will find it across virtually every category of jersey and knitwear: the hem of a basic T-shirt, the cuffs of a sweatshirt, the neckband topstitching on a jersey dress, the ankle and waistband of leggings and joggers, the edges of vests, knickers and swimwear. Once you know what you are looking for, it is almost impossible not to see it.
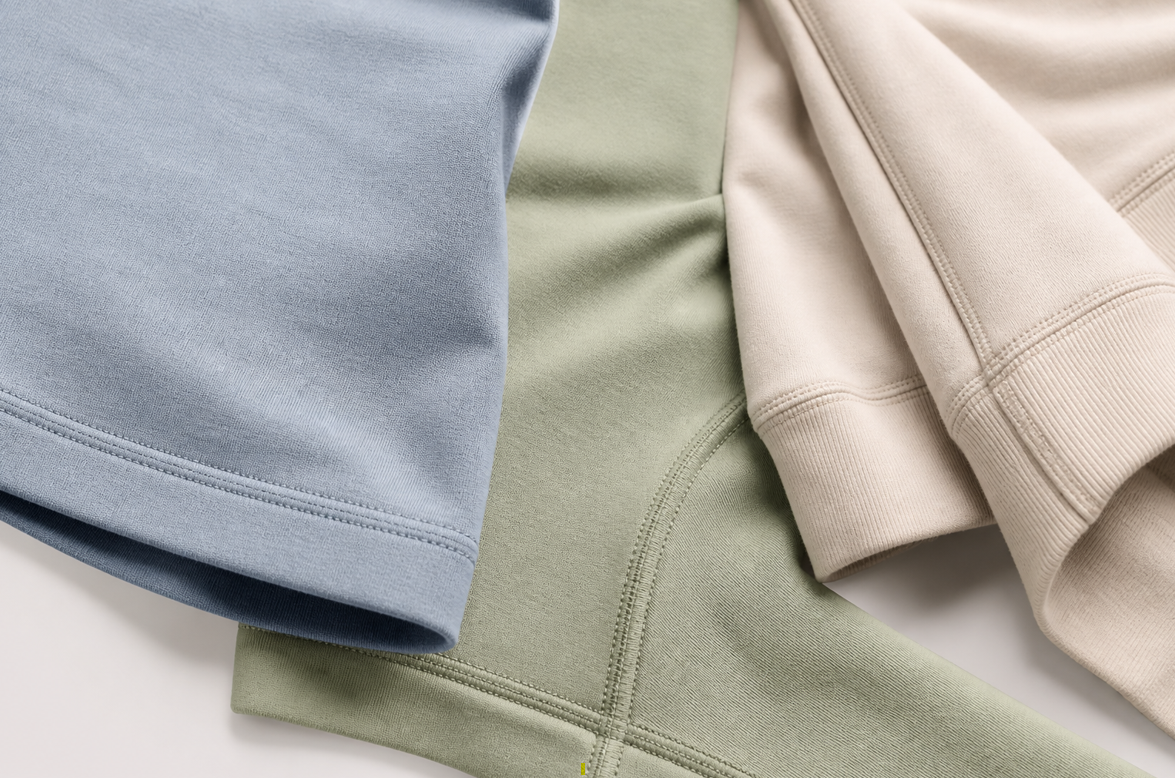
Beyond the standard hem, coverstitch appears in deliberately visible places. Contrast-colour rows tracing raglan seams, the ladder side of the stitch turned outwards along seamlines for a flat-felled athletic effect, bold triple-needle stitching used as a graphic stripe on gym tops: all of these are design choices built on the same underlying stitch structure.
The comparison that matters most for anyone who has tried to replicate this on a regular domestic machine is with a twin needle. A twin needle does produce two parallel rows on the top, but the underside is a zigzag that can tunnel, pulling the fabric into a ridge between the rows and limiting the stretch available. Coverstitch sits flatter and behaves more uniformly, especially on fine or very stretchy jerseys where the twin needle tends to drift or waver.
Why Coverstitch Feels So Professional: Stretch, Comfort and Reliability
The looper’s chained underside is the key to coverstitch’s performance. Because the thread forms a loop rather than locking against itself like a standard lockstitch, the seam can stretch and recover alongside the knit fabric. Pull a leggings hem over your heel, tug a neckline over your head, push up a cuff: the stitching moves with the fabric and springs back without losing its shape. That familiar pop of snapped threads at the hem of a poorly finished jersey garment is almost always caused by a stitch that cannot stretch far enough, whether that is a straight stitch or an insufficiently elastic zigzag.
Flatness matters too, particularly for performance wear, childrenswear and close-fitting jersey basics. Coverstitch sits very low against the fabric surface with no raised ridge or scratchy thread ends on the inside, so for a sports bra worn against the skin during exercise, or a child’s T-shirt that gets pulled on and off dozens of times a week, that smoothness is a genuine comfort requirement rather than a cosmetic detail.
For small labels, the durability argument is equally important. Coverstitch encloses and controls the raw hem allowance on the underside, reducing fraying and preventing the hem from distorting through repeated washing, so garments come out of the machine looking clean and go back into the wash looking the same way. That consistency matters enormously when a customer is assessing whether a piece is worth its price.
This is where coverstitch becomes a branding tool. Hems that stretch cleanly, stay flat after washing and look identical from one piece to the next are a significant part of why customers read a garment as professionally made rather than hand-finished. Inconsistency is visible, especially at the hem and neckline. Consistency, by contrast, builds quiet confidence in the label.
From Clean Hems to Statement Seams: How Coverstitch Expands Your Design Language
The most immediate application is also the most impactful: a crisp, flat hem on a jersey T-shirt, dress or sweatshirt that hangs cleanly and reads immediately as ready-to-wear. The same applies to sleeve and trouser hems, where an even, consistent finish from piece to piece is the difference between a garment a customer picks up and one they put back down. For a small label doing regular drops of jersey basics, this consistency is the foundation everything else is built on.
Bindings and neckbands are where coverstitch takes things a level further. Topstitching a jersey neckband or armhole binding after it has been attached flattens the seam allowance, prevents the binding from flipping outwards and frames the opening with clean parallel lines. On a premium jersey dress or a structured loungewear piece, that detail is immediately legible as a quality marker.
In activewear and technical fabrics, the stitch earns its place through both performance and aesthetics. A triple-needle coverstitch across high-stress areas of leggings, sports bras or swimwear adds reinforcement precisely where the fabric is put under the most strain, while keeping the seam smooth on the inside. Elastic attached at a waistband or leg opening with coverstitch sits flat and stretches cleanly with the body rather than bunching or lifting at the edge.
Beyond function, coverstitch is a genuine design instrument. Contrast-colour stitching following style lines gives a label a recognisable visual signature, and using the ladder side of the stitch deliberately along seamlines creates a flat-felled, sporty aesthetic popular in athleisure and workwear-influenced collections. Varying needle width between narrow, wide and triple configurations allows a studio to build a visual rhythm into a range, so that even customers who could not name the technique begin to associate that detail with the label’s identity. Along colour-block joins in technical fabrics, coverstitch simultaneously reinforces the seam and creates a visible design beat that ties panels together.
From Clean Hems to Statement Seams: How Coverstitch Expands Your Design Language
What a Dedicated Coverstitch Machine Brings to Your Studio Workflow
The core mechanical difference is straightforward: a dedicated coverstitch machine has a separate chain looper for the underside stitch, multiple needle positions that allow it to switch between narrow, wide and triple coverstitch configurations, and a single-needle chainstitch mode for basting or decorative work. Crucially, it has no cutting blades, so it operates on pre-folded hems rather than trimming as it goes. It does one set of things, and it does them extremely well.
Differential feed deserves particular attention, because it is what makes a coverstitch machine genuinely useful across the range of fabrics a small studio encounters. Two sets of feed dogs, adjustable independently, allow the machine to be tuned so that fine jersey feeds without going wavy, ribbing is controlled without stretching out of shape, and slight gathering can be introduced where the design calls for it. The adjustment range on quality machines typically runs from around 0.6 to 2.0, which is enough to handle everything from delicate single jersey to heavier French terry.
Handling bulk and seam intersections cleanly is another area where a dedicated Juki coverstitch machine earns its place. A good coverstitch will step smoothly over side seams, pocket joins and layered bindings without skipped stitches or distortion, which is essential when you are running a stack of T-shirts or leggings rather than finishing a single sample. A free arm or well-shaped flatbed makes hemming in the round practical too: sleeves, narrow cuffs and leggings legs can be slipped over the machine and stitched with clear visibility, keeping the hem even all the way around without wrestling with the fabric.
For small-run production, the real value is setup consistency. Once a machine is dialled in for a particular fabric weight and hem depth, it can run through an entire cut with identical stitch quality, which is not something a domestic machine, re-threaded and reconfigured between jobs, can reliably match. Brands with industrial heritage have developed compact, studio-friendly coverstitch models that carry these features from the factory floor into a small studio environment, and Juki UK can advise on which machine capabilities best match a label’s main product categories and production volume.
When Investing in a Coverstitch Machine Pays Off – And How to Choose Your First One
Ownership makes the clearest sense when knit and jersey finishing is a regular, high-volume part of what a studio produces. Labels doing seasonal drops of T-shirts and sweatshirts, brands whose core range is leggings, cycling shorts or performance tops, childrenswear makers whose garments are pulled on and off constantly, studios moving from one-off samples into consistent small batches: all of these scenarios put enough demand on the machine to justify having it set up and ready to go at all times. Experienced users consistently note that a coverstitch only delivers its full productivity benefit when it stays out and permanently accessible, rather than being packed away between sessions.
That said, if jersey finishing is a small and occasional part of a broader woven-fabric practice, shared studio access or machine hire may be the more pragmatic first step. The honest question is not ‘could I use this?’ but ‘would I use it enough that it changes how I work?’
When the answer is yes, the key choices are relatively straightforward. A three-needle machine opens up narrow, wide and triple coverstitch as well as single-needle chainstitch, giving the full range of stitch options for hems, neckbands, activewear reinforcement and decorative work. A two-needle machine handles the majority of everyday hemming well and is a sound starting point if the range is primarily basic jersey garments. Chainstitch availability matters if you are basting seams for fitting or if a single-row decorative stitch is part of the design vocabulary.
Day-to-day usability is where many buying decisions are won or lost. Clear, well-marked tension dials, colour-coded threading guides or assisted looper threading, an accessible free arm for round hemming, adjustable presser foot pressure with marked settings, and good lighting all matter far more in practice than headline speed figures. Testing on the actual fabrics in the studio range is essential, with particular attention to how the machine handles bulky seam intersections and technical knits; studio footprint and noise level are worth factoring in too, especially in shared or residential spaces.
Juki UK is well placed to guide this decision rather than simply sell a machine. Bringing a clear picture of the label’s fabric mix, product categories and likely production volume to that conversation will result in advice that matches machine capability to real working needs, so that the coverstitch finish becomes a reliable in-house standard rather than an aspiration.
Turn Your Knits into True Ready-to-Wear: How to Start Using Coverstitch with Confidence
Coverstitch is not simply another stitch option sitting alongside zigzag and straight stitch on a dial. It is the finishing language of modern knitwear and activewear, identifiable by its parallel top rows and laddered underside, and responsible for much of what makes jersey garments feel genuinely professionally made rather than carefully home-sewn. Once that stitch structure is visible to you, it is difficult to unsee, and it reframes what ‘professional finish’ actually means in practical terms.
The most useful first step once a machine is available is to work on offcuts of the fabrics that make up the existing or planned range. Re-hemming a T-shirt or pair of leggings already in the wardrobe is the ideal low-stakes starting project: the result is immediately comparable to a factory-finished hem, and the difference is usually striking enough to confirm very quickly whether the investment is justified. From there, experimenting with both standard hem finishing and deliberately exposed seams shows the full range of what the technique offers.
A practical audit of a current or planned collection is a valuable exercise before committing. Mark every hem, neckline, cuff, visible seam and binding that would benefit from the stretch, flatness and visual consistency of coverstitch, then assess what proportion of the finishing work that represents. For most labels with jersey or activewear at the core of their range, the list is long enough to make the business case straightforward.
The final move is to start training your eye by looking at runway and high-street pieces with coverstitch details in mind, noting where stitch width, thread colour and exposed versus concealed ladder stitching are used as design choices rather than just construction methods. Then speak with Juki UK about which coverstitch options suit your studio space, your fabric mix and your growth plans, so that the finish you have been admiring on other people’s garments becomes the standard your own label is known for.